 Pin It
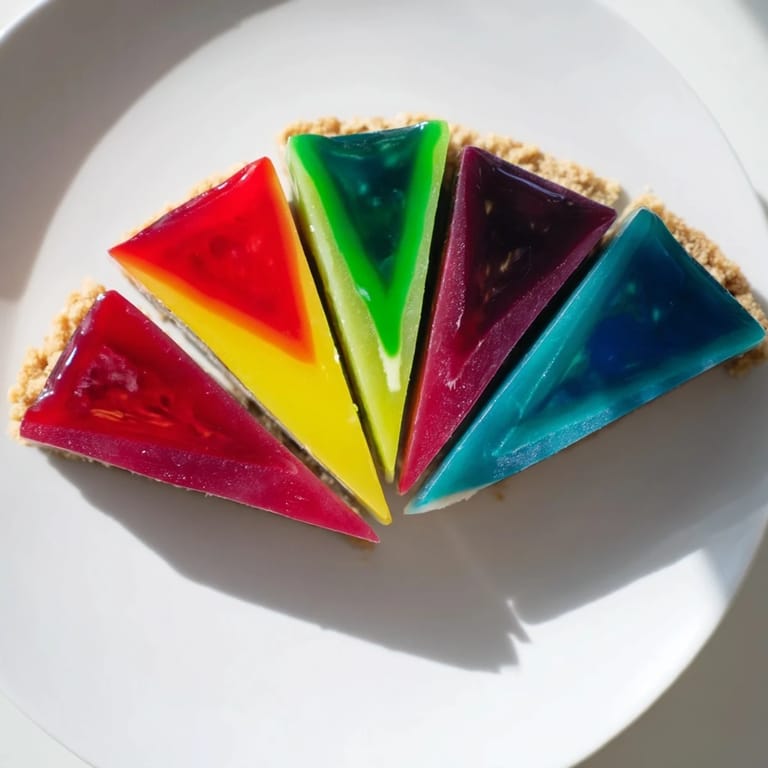
 I discovered The Kaleidoscope by accident while staring at a geometry textbook during lunch—wedges and angles suddenly felt like a metaphor for flavor combinations. That afternoon, I sketched a dessert idea in the margins: what if each slice told a different story? Three hours later, my kitchen looked like a mad scientist's lab with five bowls of jewel-toned custard, and I was carefully rigging foil dividers into a springform pan like I was building architectural blueprints out of food. When I finally sliced into it and saw those perfect V-shaped segments radiating color, I knew I'd stumbled onto something special.
I made this for my friend's birthday dinner last spring, and the moment she saw it slice open—five colors radiating like a stained glass window—she actually gasped. Everyone at the table leaned in as if they were watching a magic trick, and suddenly this dessert wasn't just about taste; it became the whole conversation. That's when I realized the best desserts aren't always the most complicated ones; they're the ones that make people feel like you've given them something they've never seen before.
Ingredients
- Whole milk and heavy cream: Together they create a silky base that gelatin can set without turning rubbery; I learned the hard way that skipping the milk makes the texture grainy.
- Granulated sugar: Just enough sweetness to let the fruit flavors shine without turning this into candy.
- Powdered gelatin or sheets: Powdered is faster and forgiving, but sheets give you more control if you're patient.
- Vanilla extract: A whisper of vanilla ties all five flavors together like an invisible thread.
- Food coloring (gel or liquid): Gel colors are more vibrant and won't thin out your mixture the way liquid can.
- Fruit purees: Raspberry, mango, kiwi, blueberry, and blackberry each bring their own personality—pick fruits that match your color palette or just use whatever's ripe.
- Digestive biscuits or graham crackers: The crumb base anchors everything and gives you something to hold onto when you slice.
- Unsalted butter: Melted and mixed with crumbs to create a press-in crust that stays put.
Tired of Takeout? 🥡
Get 10 meals you can make faster than delivery arrives. Seriously.
One email. No spam. Unsubscribe anytime.
Instructions
- Build your foundation:
- Pulse your biscuits into fine, even crumbs—they should feel like wet sand. Toss with melted butter, press firmly into the springform pan, and slide it into the fridge; a cold base stops the custard from sinking.
- Wake up the gelatin:
- Sprinkle it over cold water and wait five minutes for it to bloom, turning spongy and ready to dissolve. If you skip this step, you'll end up with clumpy gelatin that never fully sets.
- Heat and dissolve:
- Warm your milk, cream, and sugar together—watch for steam but stop before it boils. Pour the hot mixture over your bloomed gelatin and stir gently until every granule disappears into smoothness.
- Color and flavor your segments:
- Divide the custard equally and stir a fruit puree and matching food coloring into each bowl until the colors sing. Don't overthink the colors—they'll deepen slightly as they chill.
- Create the V-shaped magic:
- Cut strips of aluminum foil and arrange them into five wedge-shaped dividers in your pan, making sure they reach all the way to the center like spokes on a wheel. This is where patience pays off; take your time so the dividers stay upright.
- Pour and set your layers:
- Carefully pour each colored custard into its own wedge section, working from lightest to darkest to avoid any muddying. Chill for 30 minutes, then gently remove the foil dividers, running a thin knife around the edges first so nothing tears.
- Final chill and reveal:
- Give it at least two more hours in the cold before slicing, which lets the entire structure firm up enough to hold those beautiful clean edges. When you cut, wipe your knife between slices so the colors stay true.
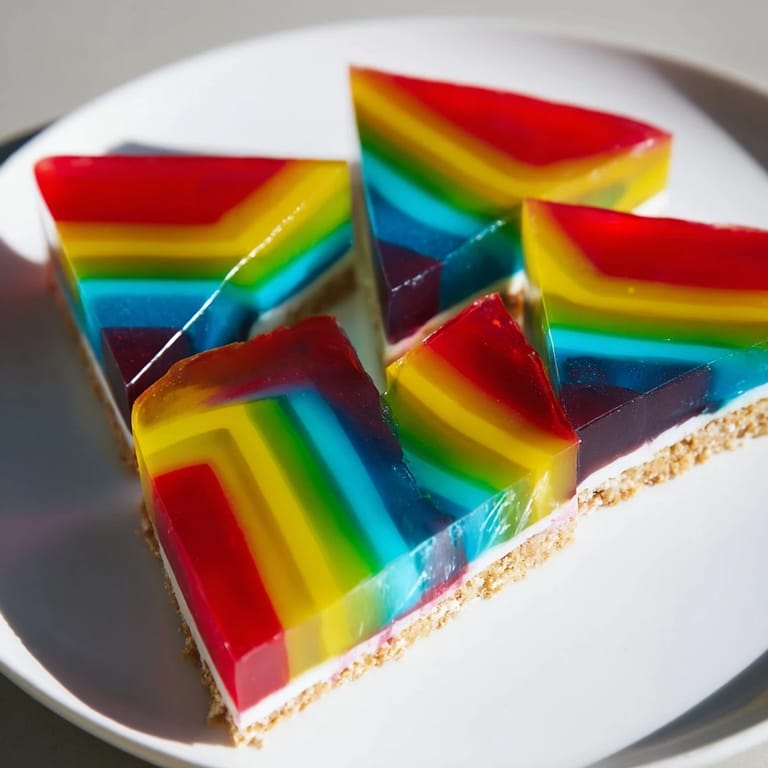 Pin It
 There's a quiet moment, maybe three hours into making this dessert, when you pull it from the fridge and the springform pan releases with a soft click—the whole structure surrenders to the knife, five perfect wedges tumbling into view. That's when you feel like you've actually pulled something off.
Customizing Your Kaleidoscope
The beauty of this dessert is how forgiving it is to your own whims. You don't have to use the exact fruits I listed; swap in passion fruit, strawberry, or even earl grey tea as your purees. I've made versions with all warm colors (raspberry, mango, peach, apricot, and plum) that felt cozy, and versions with cool tones (blueberry, blackberry, kiwi, green apple, and butterfly pea flower) that looked like ocean water. The flavors will shift, but the structure holds strong, so feel free to play.
Serving and Storage
This dessert actually gets better after a full day in the fridge, when all the flavors have settled into themselves and the custard is completely set. Slice with a warm, wet knife—dip it in hot water and wipe it dry between each cut—so the colors don't streak. Top each slice with a small mound of whipped cream and maybe a few fresh berries if you want to echo the flavors inside.
Why This Dessert Works
The Kaleidoscope sits somewhere between a panna cotta and a parfait, but it's easier than either because everything sets in the pan together. There's no layering by hand, no waiting for one layer to firm before adding the next—just five careful pours and one long, patient chill. I think that's why it's become my go-to for dinner parties; the reward-to-effort ratio is genuinely skewed in your favor.
- Make it the day before so you're not stressing about timing on party day.
- If you mess up the dividers, you can always serve it in bowls and call it a parfait instead.
- Leftover fruit purees keep in the fridge for three days if you want to make individual components for something else.
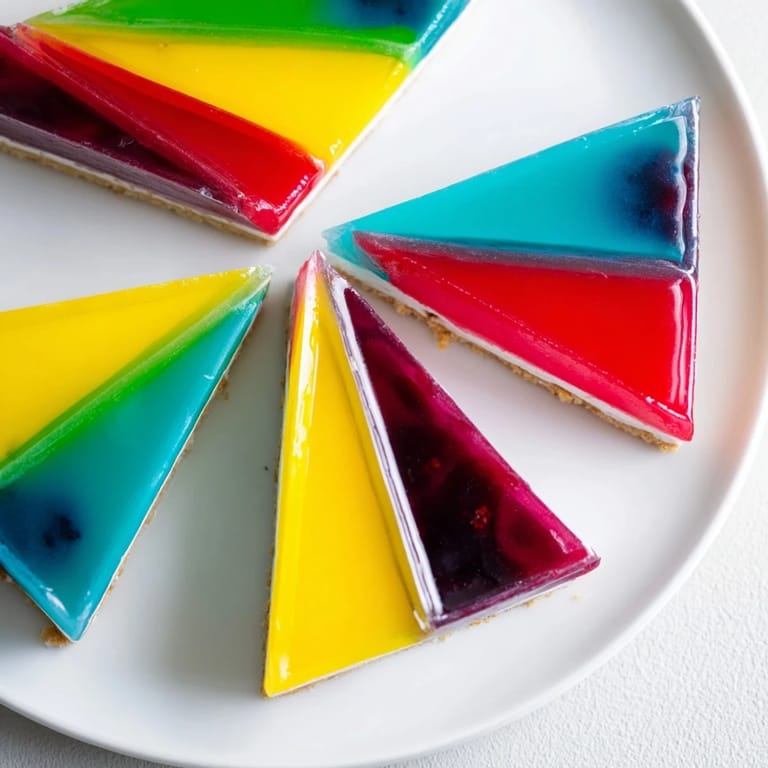 Pin It
 Make this dessert when you want to slow down and actually feel like you've created something rather than just assembled it. The Kaleidoscope is proof that beautiful food doesn't have to be stressful—sometimes it just takes a little imagination and five different colors.
Questions About This Recipe
- → How are the V-shaped segments formed?
Use aluminum foil or cardboard dividers to partition the pan into five V-shaped sections before pouring the colored mixtures, then chill to set and carefully remove dividers.
- → Can I customize the fruit flavors?
Absolutely. Feel free to use any fruit purees and colors to create your own unique combinations and visual effects.
- → What can I substitute for gelatin to make it vegan?
Agar-agar can be used instead of gelatin, along with coconut milk and cream for a plant-based variation.
- → How long should the dessert chill before serving?
After assembling the layers, chill for at least 2 hours to ensure the dessert is fully set for clean slicing.
- → What is the base made of?
The base is crafted from crushed digestive biscuits mixed with melted butter, pressed firmly into the pan and chilled for a crunchy foundation.