 Pin It
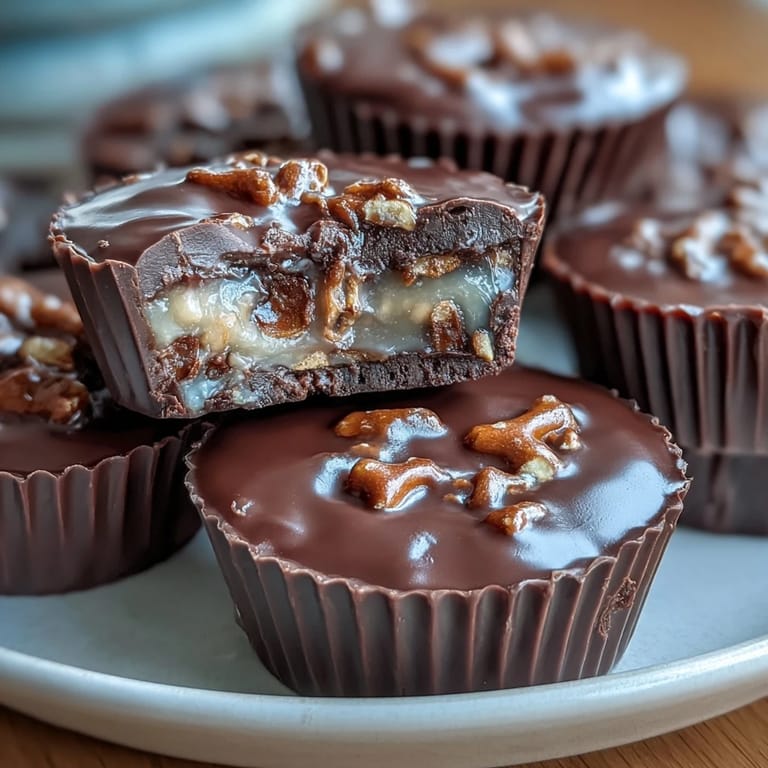
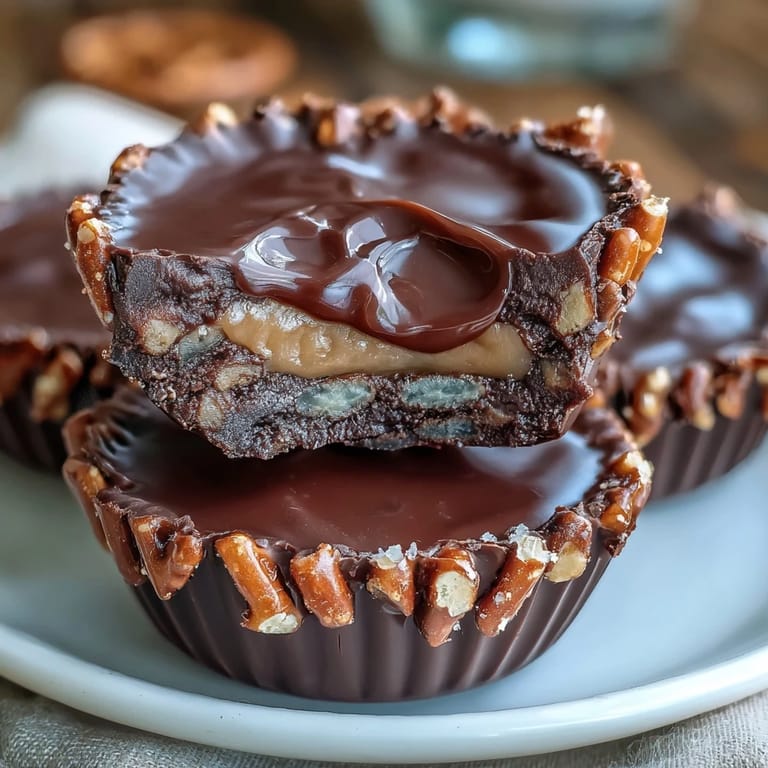
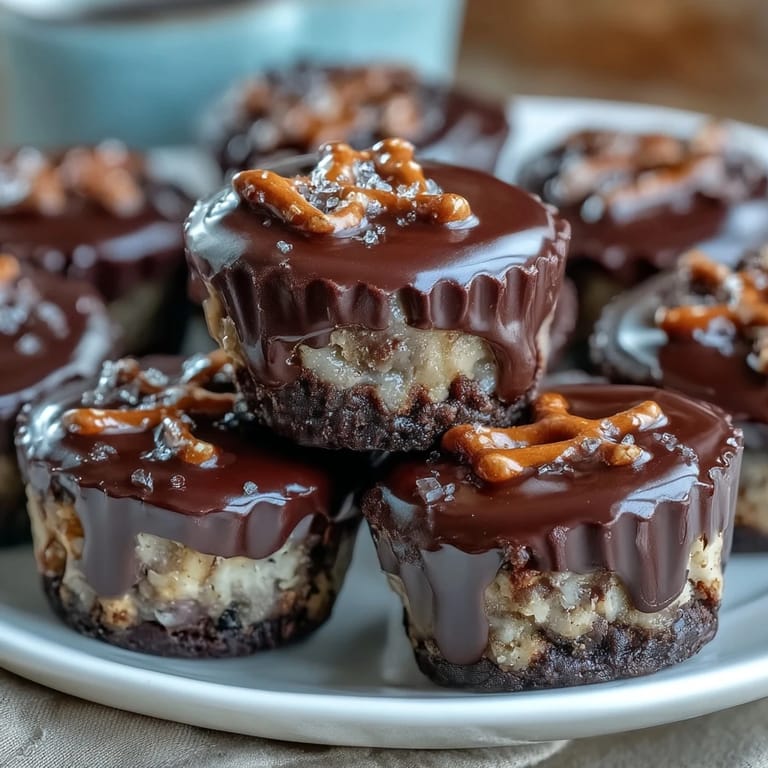
 My coworker brought these to the office one Tuesday, and I've never been the same since. She called them her secret weapon for potlucks, and after one bite, I understood completely—the way the pretzel base crackled against my teeth, followed by that smooth peanut butter center and final chocolate coating, felt like someone had finally solved the equation I didn't know I'd been waiting for. That afternoon, I asked for the recipe, and within a week, I was making my own batch while standing in my kitchen at midnight, unable to resist the urge to create something that felt both homemade and impossibly polished.
I made these for my sister's book club last month, and there's something humbling about watching adults abandon conversation mid-sentence to focus entirely on eating one of your homemade treats. She texted me the next day asking if I could make them for her birthday party, which meant everything coming from someone who usually orders desserts from bakeries. Now they're basically my signature move at any gathering, which is wild considering how simple they actually are to make.
Ingredients
- Mini salted pretzels (1 cup, about 60 g), crushed: The foundation of everything here—these need to stay salty and crispy, so don't pulverize them into powder, just break them into bite-sized pieces that will hold together when mixed with butter.
- Unsalted butter (2 tbsp), melted: This acts as the binder for your pretzel base, and using unsalted lets you control the overall salt level since the pretzels are already doing their job.
- Creamy peanut butter (3/4 cup, about 180 g): The good stuff here—natural peanut butter works beautifully if you like a slightly less sweet version, but standard creamy is the safest bet for consistent results.
- Powdered sugar (1/4 cup, about 30 g): This sweetens the filling and gives it that light, spreadable texture without making it taste like frosting.
- Vanilla extract (1/4 tsp): A small amount goes a long way to deepen the peanut flavor, making everything taste more complex and intentional.
- Salt (pinch): This tiny bit ties together the sweet filling with the salty pretzel base, acting as your flavor unifier.
- Semi-sweet chocolate chips (1 1/4 cups, about 210 g): The final layer that brings everything home—semi-sweet is the reliable middle ground between bitter and sweet.
- Coconut oil or unsalted butter (1 tbsp): This melts into your chocolate and keeps it glossy and smooth without adding any competing flavors, making the chocolate layer actually coat properly instead of seizing up.
Tired of Takeout? 🥡
Get 10 meals you can make faster than delivery arrives. Seriously.
One email. No spam. Unsubscribe anytime.
Instructions
- Set up your workspace:
- Line your muffin tin with paper liners—this step saves you from chocolate-covered frustration later.
- Build the pretzel foundation:
- Crush your pretzels until they're chunky but hold together, then toss them with melted butter until every piece gets coated. Press about a tablespoon of this mixture firmly into each liner, creating a compact base that won't crumble when you add the filling on top.
- Create the peanut butter layer:
- Whisk together your peanut butter, powdered sugar, vanilla, and salt until completely smooth and spreadable. You want this filling to spread easily but still hold its shape, so if it feels too thick, a tiny splash of milk works wonders.
- Melt the chocolate carefully:
- Use 30-second microwave bursts instead of one long blast—this prevents seizing and gives you a silky-smooth coating every single time. Stir in your coconut oil once the chocolate is mostly melted, letting residual heat finish the job.
- Assemble with intention:
- Place a tablespoon of peanut butter mixture on each pretzel base, spreading it gently to the edges. This creates a barrier between the pretzel and chocolate, keeping your base crispy instead of soggy.
- Chocolate the top:
- Spoon your melted chocolate over each cup and use the back of the spoon to smooth it into an even layer—this doesn't need to be perfect, and slight imperfections actually look more homemade and inviting.
- Chill until set:
- At least 30 minutes in the refrigerator will firm everything up, though overnight is ideal if you can wait.
 Pin It
 There's a specific moment when you pull these from the fridge and they're perfectly set, still slightly cool to the touch but not frozen solid, and you realize you've actually made something restaurant-quality in your own kitchen. It's one of those small victories that makes you feel capable and creative, even if you're just mixing things together in bowls.
The Sweet and Salty Magic
What makes this recipe work isn't any one ingredient but the balance between opposing flavors and textures. The salt in the pretzels plays against the sweetness of the peanut butter and chocolate, creating a push and pull that keeps your taste buds engaged instead of satisfied after one bite. Once you understand this dynamic, you'll start seeing it everywhere in food you love, and honestly, that's when cooking becomes less about following instructions and more about understanding why certain combinations work.
Customization Without Chaos
These cups are genuinely forgiving in terms of personalization—swapping chocolate types, pretzel brands, or even peanut butter styles usually results in something delicious. I once made a batch with dark chocolate because that's all I had, and they were so good that I've never gone back to semi-sweet, though my friends who prefer sweeter desserts still vote for the original version.
Storage and Longevity
These keep beautifully in an airtight container in the refrigerator for about two weeks, though they rarely last that long in my house. I've learned to store them in a single layer on parchment paper rather than stacking them, because stacking causes the chocolate to crack and stick to the layer above.
- Make a double batch and freeze extras for up to three months—they thaw quickly and taste just as good.
- If chocolate cracks when you're melting it, add a tiny bit more coconut oil and stir slowly instead of panicking and starting over.
- These travel surprisingly well if you pack them carefully in a box with parchment between layers, making them perfect for gifts or long drives.
 Pin It
 Making these has become my go-to way of showing people I care without pretending I'm a professional baker. There's something deeply satisfying about handing someone a homemade treat that tastes like someone actually thought about them while making it.
Questions About This Recipe
- → How do I make the pretzel base crunchy?
Crush mini salted pretzels finely and mix with melted butter, then press firmly into muffin liners to form a crunchy base that sets after chilling.
- → Can I use a different nut butter filling?
Yes, alternatives like almond or cashew butter can be used, adjusting sweetness as needed for balanced flavor.
- → What chocolate works best for topping?
Semi-sweet chocolate chips melt smoothly and provide a balanced sweetness, but dark or milk chocolate can be used depending on preference.
- → How long should the cups chill before serving?
Chill for at least 30 minutes until the chocolate and filling are firm for easy removal and optimal texture.
- → Are these cups suitable for gluten-free diets?
Yes, by using gluten-free pretzels, this treat can accommodate gluten-free needs without sacrificing crunch.