 Pin It
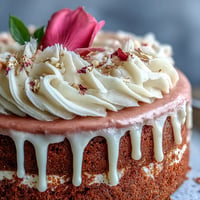
 My cousin called me three weeks before graduation with panic in her voice—she'd promised to make a cake but had no idea where to start. I found myself at her kitchen counter on a random Tuesday, flour dust catching the afternoon light, and we decided right then that this cake would be her statement piece. The moment those three layers came out of the oven, golden and level, she grinned like she'd already won. White chocolate drip, gold balloons, the works—because some milestones deserve drama.
I watched my cousin cut into that cake at her graduation dinner, surrounded by family who'd driven hours to celebrate, and the white chocolate drip caught the candlelight in this perfect, glimmering way. Someone said it looked like something from a magazine, and she just smiled at me across the table. That's when I realized this cake does something beyond taste good—it makes the moment feel intentional, marked, worthy of remembering.
Ingredients
- All-purpose flour: The backbone of a tender crumb; make sure it's fresh and stored away from moisture so your sponge rises properly.
- Baking powder: Don't skip sifting the dry ingredients together—this prevents lumps and ensures even rise throughout all three layers.
- Unsalted butter and granulated sugar: Room temperature is non-negotiable here; cold butter won't cream into that pale, fluffy base that makes the texture so light.
- Large eggs: Also room temperature; they emulsify better and create a more stable batter that rises evenly in the oven.
- Pure vanilla extract: Use the real thing—imitation just doesn't have the warmth this cake needs to feel celebratory.
- Whole milk: Adds moisture and tenderness; the alternating method with flour keeps the batter from becoming dense.
- White chocolate: Choose a quality brand for both the buttercream and drip; cheap white chocolate tastes waxy and won't melt smoothly.
- Powdered sugar: Always sift before adding to buttercream to avoid gritty, lumpy frosting that feels disappointing.
- Heavy cream: This is what makes the drip drip, so don't thin it too much or it'll just pool instead of cascade.
- Crispy pearls or malt balls: These become your balloons; they're light enough to perch on top without sinking and catch the light beautifully.
- Edible gold spray or luster powder: The finishing touch that transforms simple candy into something ceremonial.
Tired of Takeout? 🥡
Get 10 meals you can make faster than delivery arrives. Seriously.
One email. No spam. Unsubscribe anytime.
Instructions
- Prepare Your Pans and Heat the Oven
- Set your oven to 350°F and line three 8-inch round pans with parchment—I trace the bottom and cut it out because it's faster than the fold-and-guess method. The greased parchment ensures your layers won't stick, which matters when you're building something this tall.
- Combine the Dry Ingredients
- Whisk flour, baking powder, and salt together in a medium bowl, breaking up any flour clumps as you go. This prevents lumpy pockets in your final cake.
- Cream Butter and Sugar Until Pale
- In a large bowl, beat room-temperature butter and sugar for about three minutes until it looks almost mousse-like and significantly lighter. This step aerates the mixture so your cake rises tall and stays tender.
- Add Eggs and Vanilla
- Drop in each egg one at a time, beating well after each addition so everything emulsifies properly. Then add vanilla and mix until fully incorporated.
- Alternate Wet and Dry Ingredients
- Starting with flour, alternate between the dry mixture and milk, beginning and ending with flour—this prevents overmixing and keeps the batter tender. Mix on low speed just until you don't see streaks of flour anymore.
- Divide and Bake
- Split batter evenly among pans and smooth the tops, then bake for 30 to 35 minutes until a toothpick comes out clean. You'll know they're done when the edges pull slightly away from the pan sides.
- Cool the Layers
- Let them rest in the pans for 10 minutes (this prevents them from breaking), then turn them out onto wire racks to cool completely. Rushing this step invites a collapsed cake, so patience matters here.
- Make the White Chocolate Buttercream
- Beat softened butter until smooth, gradually add sifted powdered sugar, then fold in cooled melted white chocolate, vanilla, salt, and 2 tablespoons of cream. Keep beating until fluffy and light; add more cream only if needed to reach a spreadable consistency.
- Build the Cake Layers
- Level the cooled cakes if needed, place the first layer on your serving plate, and spread with buttercream. Repeat with the remaining layers, then apply a thin crumb coat and chill for 30 minutes to seal in any crumbs.
- Apply the Final Frosting
- Cover the entire cake with a thick, generous coat of buttercream, smoothing the sides with an offset spatula and making the top as even as you'd like. This is your canvas.
- Prepare the White Chocolate Drip
- Heat heavy cream until it just starts to steam, pour it over chopped white chocolate, let sit for one minute without stirring, then stir until silky smooth. Cool to room temperature before drizzling so it flows gracefully without running off.
- Create the Cascading Drip Effect
- Using a spoon or squeeze bottle, let the white chocolate ganache drip around the top edge of the cake, letting gravity do the work as it cascades down. Fill the center with more ganache and smooth it out, creating that luxe, intentional look.
- Decorate with Gold Balloons
- Spray your crispy pearls or malt balls with edible gold spray (or roll them in luster powder) and let dry completely. Insert toothpicks or thin cake wires and arrange them in a festive cluster on top.
- Chill and Serve
- Refrigerate the finished cake until you're ready to serve, then bring it to room temperature for 20 to 30 minutes before slicing so the flavors shine and the texture stays tender. Cold cake tastes muted; room temperature cake tastes like celebration.
 Pin It
 My cousin brought me a slice in a small box the day after the party, wrapped carefully with foil so the frosting wouldn't smudge. She said people were still talking about it, how beautiful it looked, how it tasted like vanilla and celebration—but mostly they wanted to know if she'd made it herself. She had, and she knew it, and that made all the difference.
Why White Chocolate Works Here
White chocolate has a reputation for being sweet and one-note, but when it's quality stuff and you're using it thoughtfully, it becomes elegant. The buttercream mellows under the weight of all that powdered sugar, and the drip adds visual drama without tasting cloying. I've made this cake with dark and milk chocolate too, and they're fine, but white chocolate has this way of feeling formal, like you're marking something important. It catches light differently, photographs beautifully, and tastes clean instead of heavy.
The Gold Balloon Secret
Those gold balloons are easier than they sound, and they're what push this cake from nice to memorable. The edible gold spray is available at baking supply stores and online, and a little goes a long way—you only need a few light passes to transform plain candy into something that looks intentional. If spray makes you nervous, edible luster powder mixed with a tiny bit of vodka or clear extract works just as well; brush it on and let it dry. The toothpicks hold them stable, and the arrangement matters more than perfection—a loose cluster always looks more celebratory than something too symmetrical.
Storage and Make-Ahead Strategy
This cake actually improves a day or two after baking because the layers settle and the flavors meld. You can bake the sponge layers up to three days ahead, wrap them tightly, and freeze; thaw at room temperature before assembling. The buttercream keeps for up to a week in the refrigerator and can be re-whipped before frosting if it looks separated.
- Assemble and frost the cake no more than a day before serving so the buttercream stays fresh and the cake doesn't dry out.
- Apply the gold balloon decorations as close to serving time as possible so they stay vibrant and don't absorb moisture from the frosting.
- Store the finished cake in the refrigerator, but always bring it to room temperature before serving for the best flavor and texture.
 Pin It
 Graduation cakes mark the moment someone steps into what's next, and this one does it with grace. Make it for someone you love, and watch how a beautiful cake becomes part of their memory of that day.
Questions About This Recipe
- → How do I achieve a smooth white chocolate drip?
Heat the cream until simmering, then pour over chopped white chocolate and let sit for a minute before stirring until smooth. Cool slightly before dripping around the cake edges.
- → What’s the best way to keep the sponge moist?
Ensure not to overmix the batter and bake until a toothpick comes out clean. Cooling the layers completely before assembling helps maintain moisture.
- → Can the gold balloons decoration be made ahead?
Yes, spray or dust white chocolate pearls with edible gold and insert toothpicks, allowing them to dry completely before arranging on the cake.
- → How should the cake be stored before serving?
Store refrigerated for up to 3 days and bring to room temperature before serving for optimal texture and flavor.
- → What ingredient adjustments enhance vanilla flavor?
Adding vanilla bean paste to the batter intensifies the vanilla notes in the sponge.